tomwer z-stitching application#
Step 0: Connect to a Slurm node (if you want to run stitching remotely) and activate a Python environment#
Connect to a node#
For this use case, the ‘interactive’ partition is recommended. Here, we are using the GUI, so you will also need X forwarding.
Depending on the dimensions of the camera and the number of scans/volumes, you might need more or less memory.
ssh -XC cluster-access
salloc --partition interactive --mem=256G --x11 srun --pty bash -l
Activate a Python environment containing tomotools#
For example, we can use the ‘stable’ version of the tomotools.
module load tomotools/stable
Then you should have access to all tomotools software. You can check it by doing
which nabu
which nxtomomill
which tomwer
These commands should return the path of the applications.
Step 1: Launch tomwer z-stitching with a set of NXtomos or volumes to be stitched#
In this example, we want to stitch together a set of NXtomos (from a z-series). We assume that we already have all the NXtomo files under PROCESSED_DATA/{COLLECTION}/{DATASET}/*.nx.

If you don’t have the NXtomos, you can have a look at nxtomomill batch processing which explains how to batch call nxtomomill h52nx
1.1 Launch the application#
To launch it, you can simply use the command
[1]:
# ! tomwer z-stitching PROCESSED_DATA/{COLLECTION}/{DATASET}/*.nx
You can access help for the application by using nxtomomill h52nx --help
It will load metadata of all requested scans (or volumes) and will open a window with all this information.
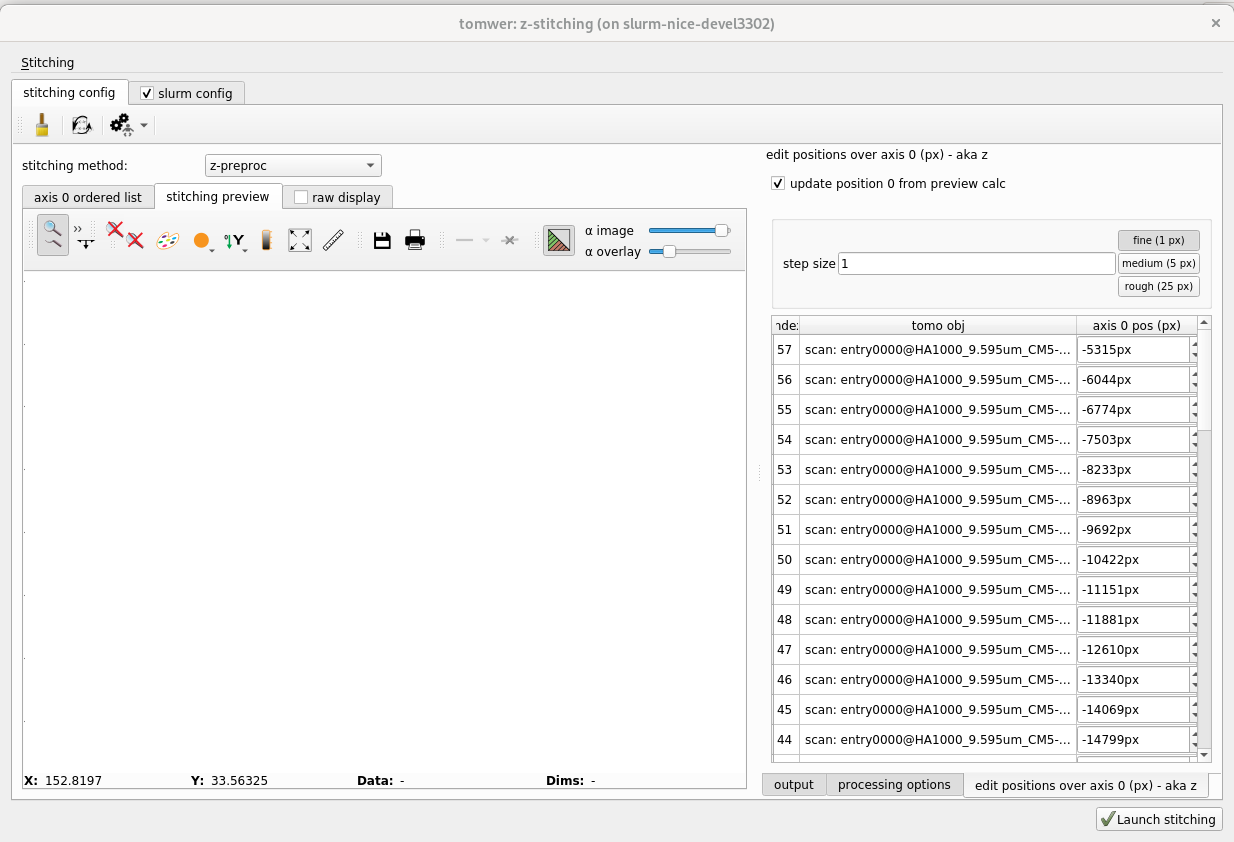
On the right, all the scans or volumes should be visible. If there are any missing, you can add them from stitching -> add tomo object.
1.2 Set up the stitching#
Once you have all objects that you want to stitch:
1.2.1 Check that the axis positions have been found and make sense. Otherwise, edit them.#
The axis positions are available from the panel on the right edit positions over axis 0 They should be obtained automatically from the scan or volume metadata (volume must have been reconstructed with nabu 2024 or higher). If this is not the case, you can still provide them manually.
1.2.2 Tune the stitching settings.#
Once the positions seem (approximately) correct, you can define and tune the stitching to be done. You can access it from the panel on the right ‘processing options’. Here we will only present the ‘basic’ parameters.
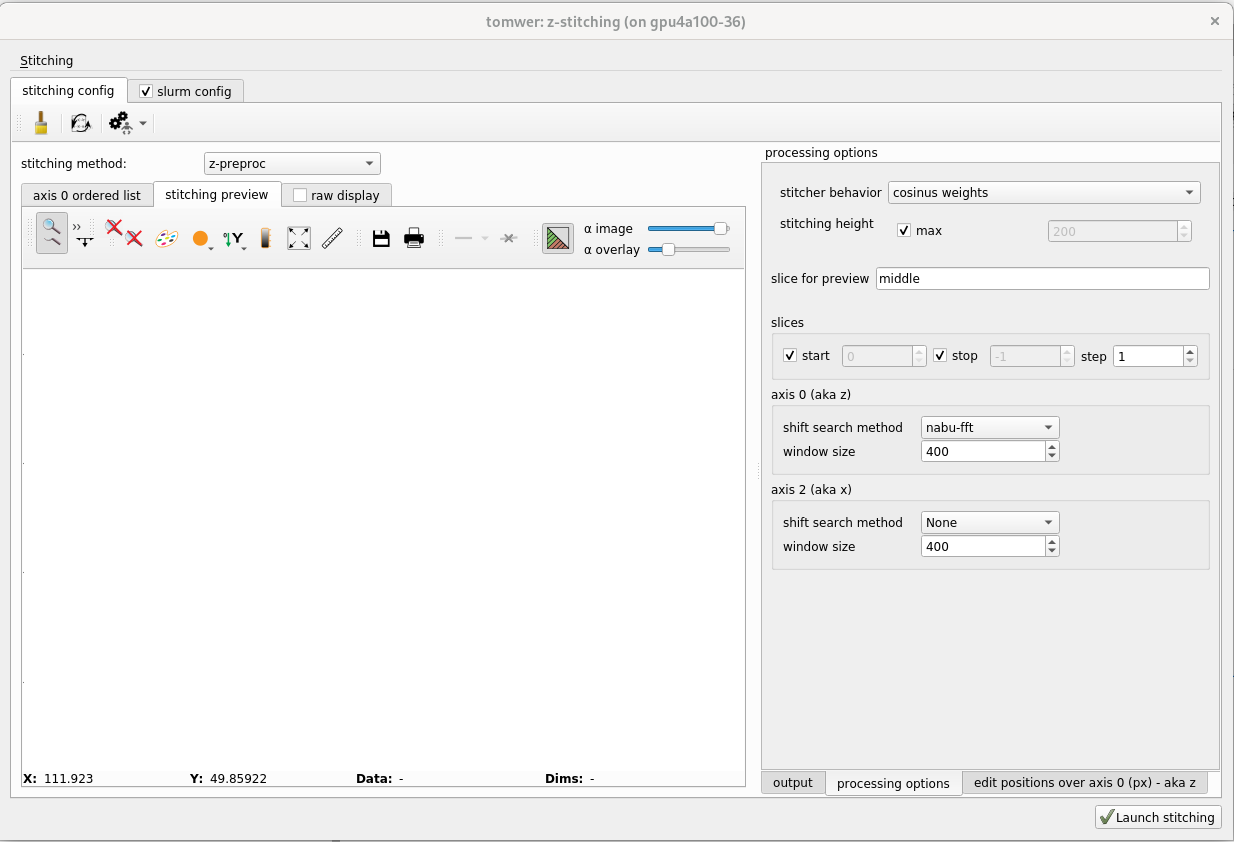
For example, by default, the overlap will be created on the largest region possible. But sometimes it can be interesting to reduce the size to achieve a sharper image.
To modify it, uncheck ‘stitching height / max’ and provide the value.
Motor position refinement#
The motor position can be refined by the ‘shift search’ algorithm. For each overlap, it will pick the two images at the overlap region and will call one of the cross-correlation algorithms (shift-search method).
If no algorithm is defined, then there will be no refinement.
1.2.3 Process some preview#
Once you are happy with the settings, you can ask to create a preview of the stitching.
This will call the exact same code as the stitching of the entire volume, allowing you to determine if you are satisfied with the parameters.
You can either press the dedicated button:  or use the ‘F5’ shortcut.
Then, tune the stitching configuration, scans/volumes positions until you are happy with the preview.
1.3 Finalize and run the stitching#
Once the preview looks good, you can start the stitching. This will perform the stitching for the entire volume.
You can either press the dedicated button: or use the ‘F6’ shortcut.
In case you want to run stitching in a remote session (e.g., via tmux), you can use the command line as follows:
[2]:
# ! tomwer z-stitching PROCESSED_DATA/{COLLECTION}/{DATASET}/*.nx --run
Once the stitching is finished, you will have the final stitched volume available in the output directory.