
Volume z-stitching tutorial#
(Optional) Access the esrf cluster and load the ‘tomotools’ module#
Skip this section if you are not using the ESRF infrastructure. Otherwise, please continue:
Connect to the slurm cluster from remote.esrf.fr
salloc -XC cluster-access
Connect to a partition with X forwarding, such as interactive or nice. Note that GPU resources are not required for any step of the stitching process.
salloc --partition interactive --x11 --gres=gpu:1 srun --pty bash -l
load the tomotools module
module load tomotools
Launch tomwer z-stitching and add volume to be stitched together#
You can provide the list of volumes to be stitched together as an application option (1)
tomwer z-stitching *_vol.hdf5
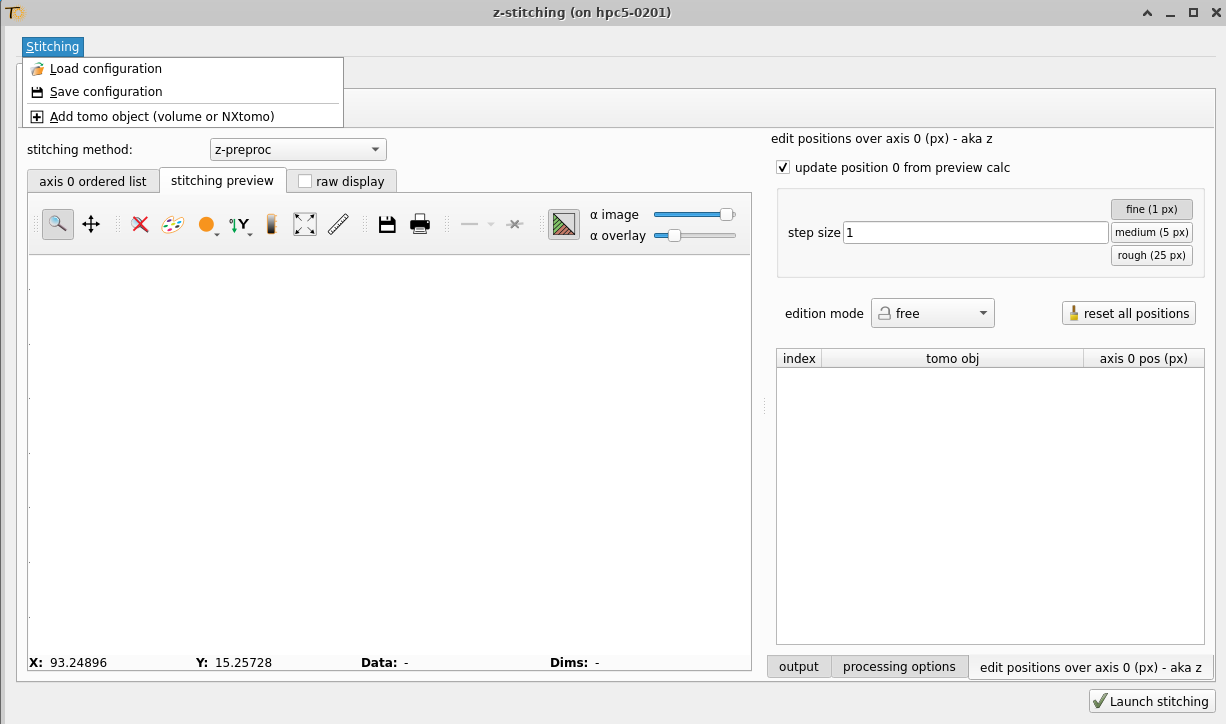
Alternatively, you can launch the application and manually add all the volumes from the top-level menu by selecting ‘Stitching’ -> ‘Add tomo object’ (2)
tomwer z-stitching
We strongly recommend using the first option, as it is less cumbersome. If you already have a stitching configuration file (see later), you can also load it directly from
tomwer z-stitching --config my_file.cfg
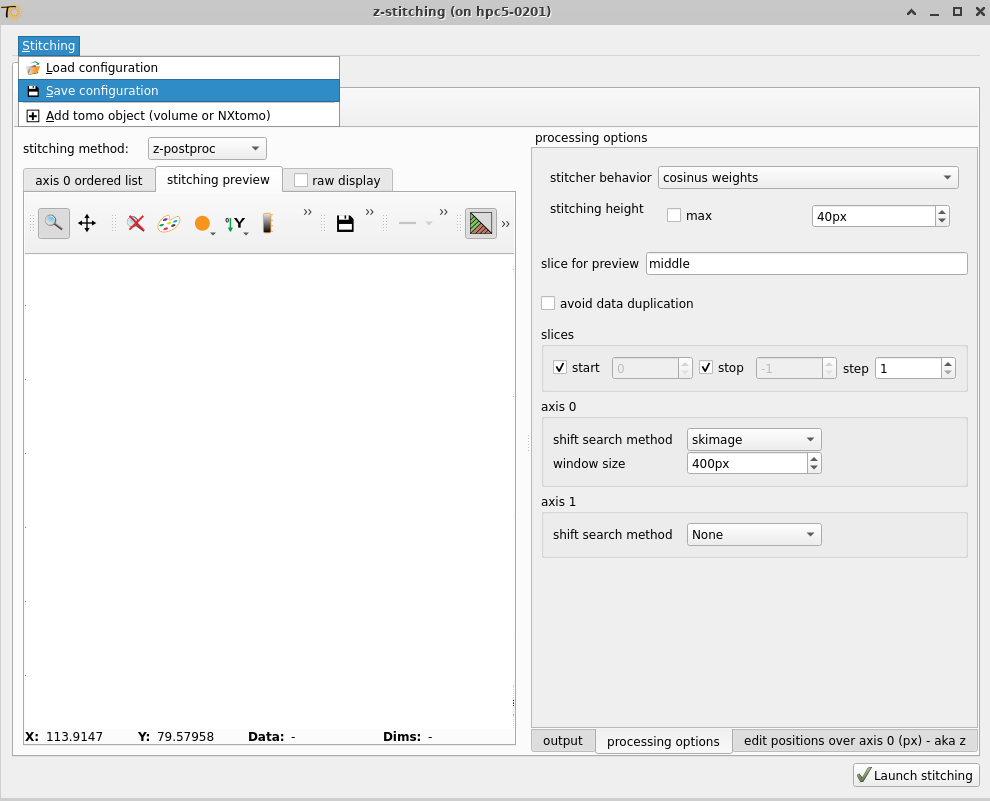
Once you have completed step (1), (2), or (3), you should see an interface that looks like:
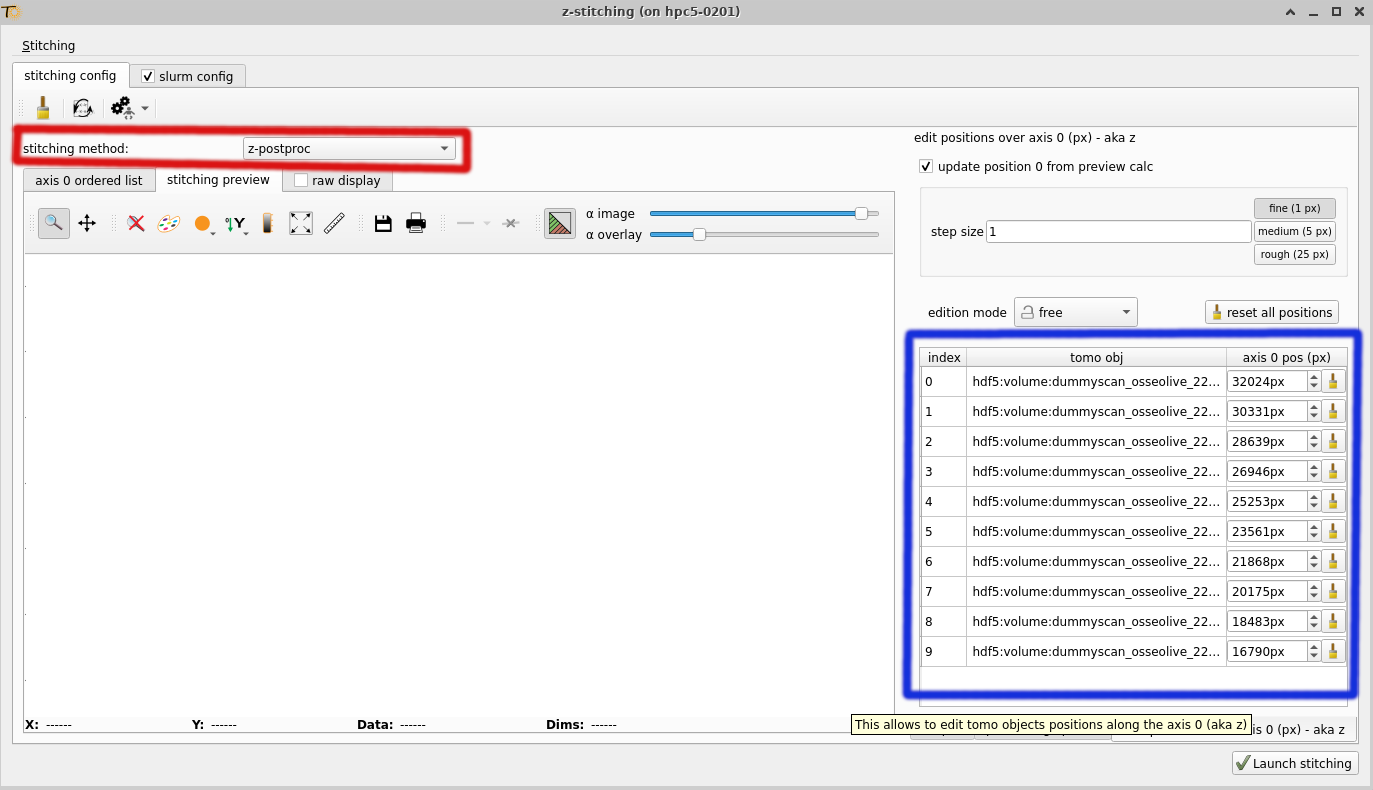
On the right, you should see all the volumes you want to stitch together (highlighted in the blue box). Please ensure that the correct number of volumes is displayed.
Warning
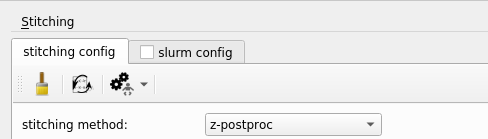
For stitching reconstructed volumes (from a z-series), the ‘stitching method’ should be set to z-postproc (highlighted in the red box). When stitching raw projections, you should set the one of ‘preproc’ methods. Conversely, for stitching projections (raw data), you should also target the ‘preproc’ methods.
Hint
When stitching large volumes, it is recommended to use the OpenGL backend with the –use-opengl-plot option to improve responsiveness. Warning: Ensure that OpenGL forwarding is properly configured for this mode.
For more information see silx OpenGL troubleshooting.
tomwer z-stitching --use-opengl-plot
Setting the stitching parameters#
With your volumes ready, you can now fine-tune the stitching parameters. Here are some common settings:
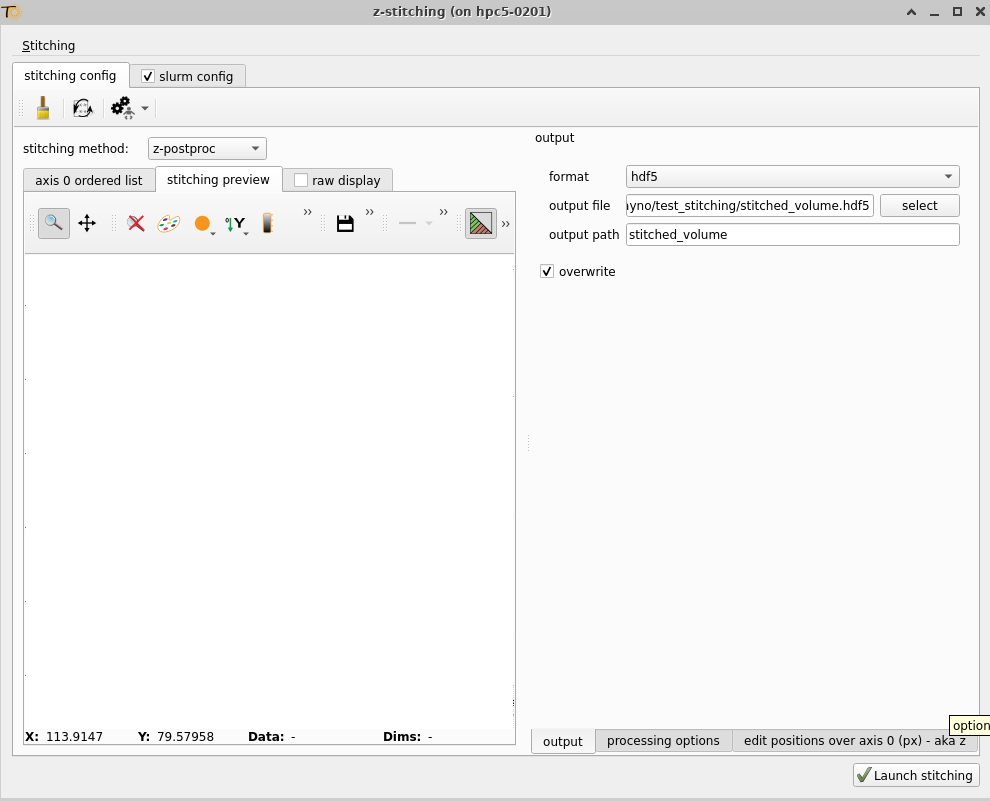
- output tab
- For
preprocmode output nexus file: where to save the nexus file (result of the stitching on projections).
HDF5 dataset path: Location of the HDF5 dataset inside the file.
overwrite: Overwrite if file already exists.
- For
- For
postprocmode format: for the time being please stick to hdf5.
output file: where to save the result of the stitching
HDF5 dataset path: Location of the HDF5 dataset inside the file.
overwrite: Overwrite if file already exists.
- For
Warning
Do not provide paths with spaces. Those are not properly handled at the moment.
- processing options
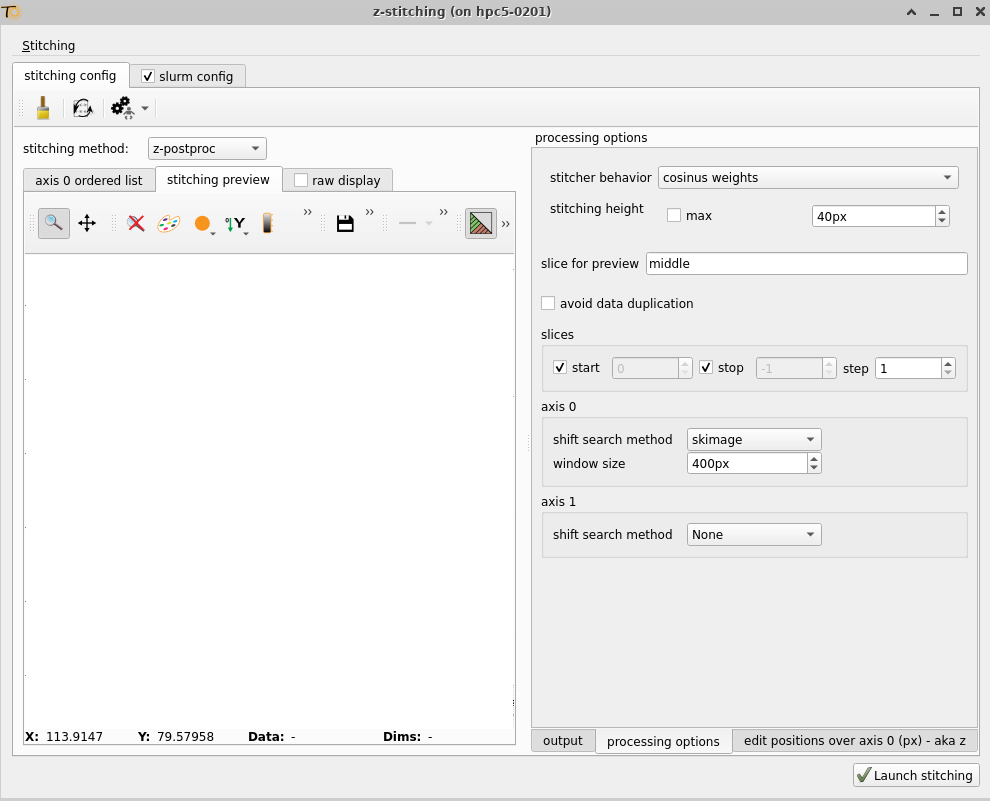
stitching height: By default, the largest possible overlap is used. However, you may want to start with a smaller area to ensure the overlap is correctly identified before finalizing with the maximum size.
axis shift search method: several methods exists to refine the positions of the different volumes. So you might want to try several of them.
edit positions over axis: usually this tab is used initially to provide / check initial position and later on to fine tine the positions.
Saving a stitching configuration#
You can save the stitching configuration, including settings and volumes, by selecting ‘Stitching’ -> ‘save configuration’.
We recommend saving the configuration periodically. You can reload it by selecting ‘Stitching’ -> ‘load configuration’ or via the CLI as described in stitching_load_config_from_CLI
Note
the stitching configuration is automatically saved near the output file under as ‘stitching_conf_autosave.conf’
Preview of the stitching#
With your volumes and settings ready, you can preview the stitching by clicking the ‘Preview’ button
Hint
You can also trigger the preview using the keyboard shortcut ‘F5’. We highly recommend using this shortcut for convenience.
Once the preview is complete, you will see the stitched result.
In the preview, you can show or hide the overlap areas using the dedicated button (red square).
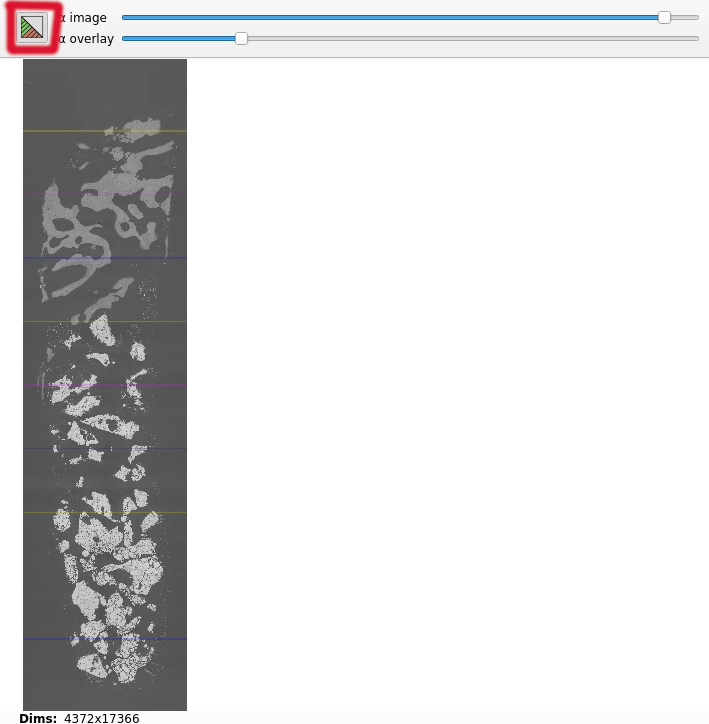
Note
Data outside those regions are ‘raw data’.
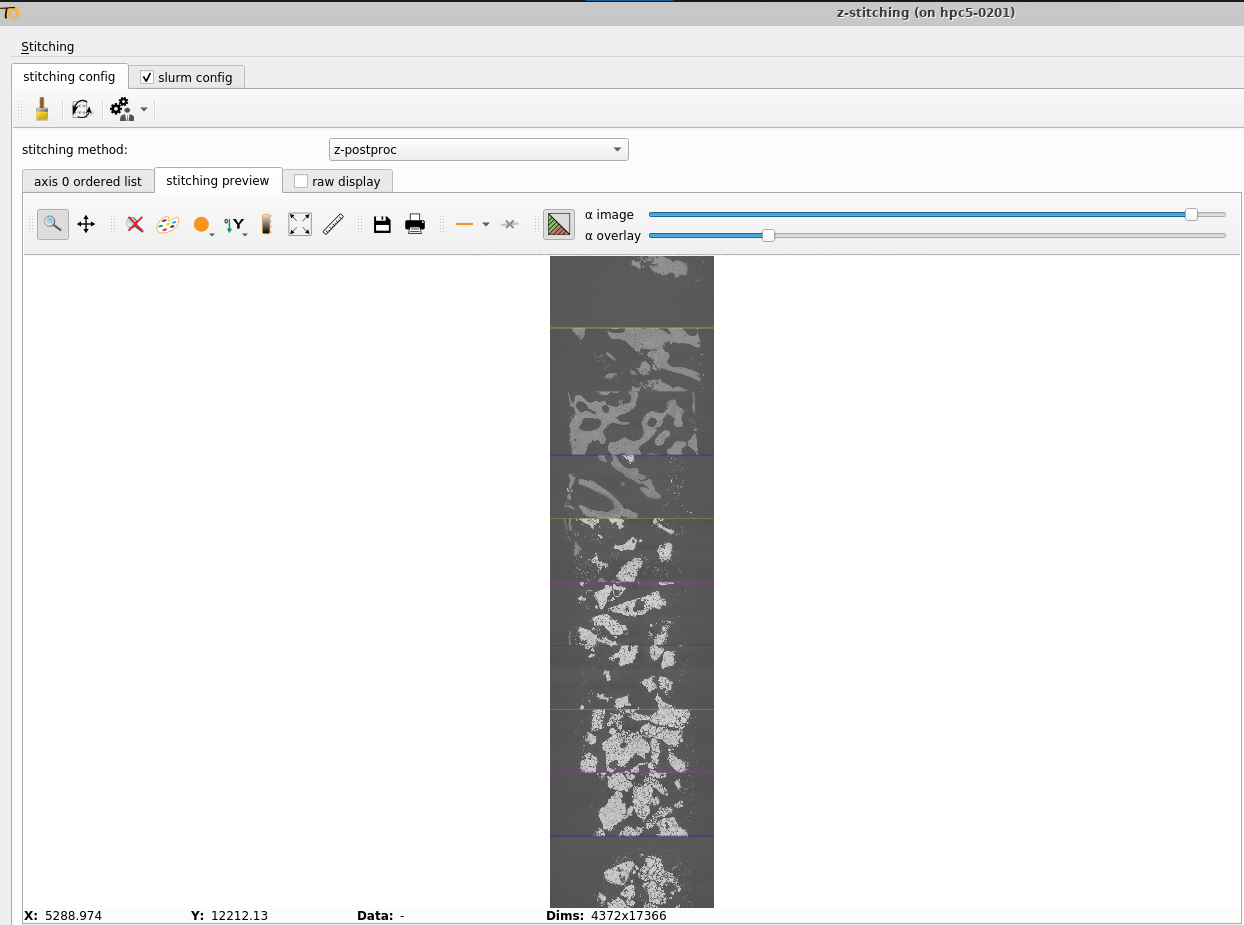
Warning on volume up/down flip#
A common issue is the ‘overlap’ of the volume, as this information is not currently passed along during reconstruction. This may cause up/down flip issues, resulting in a preview that looks like:
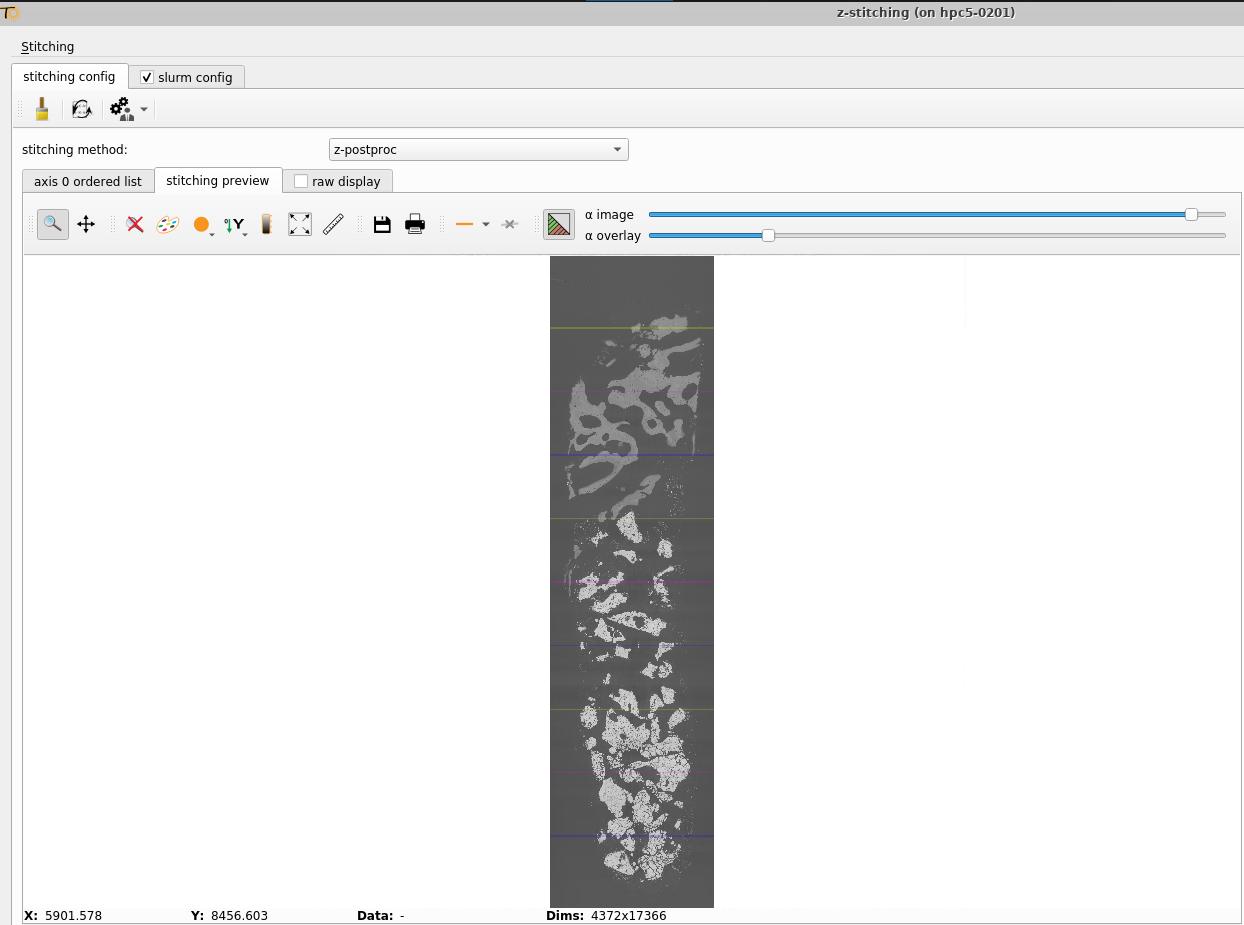
When we would expect:
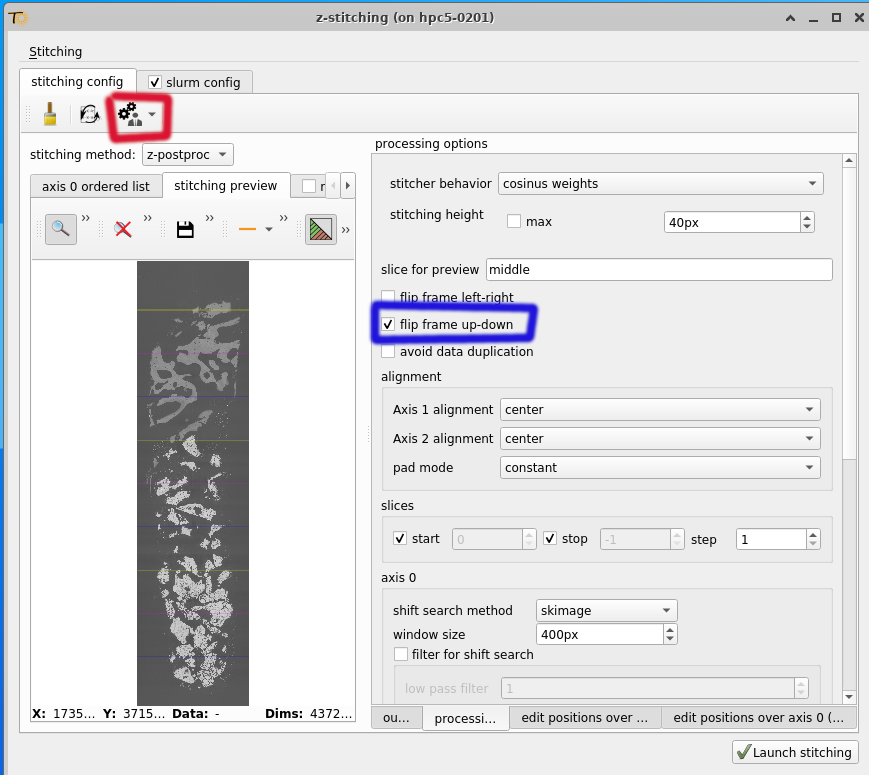
If this issue occurs, you can manually flip the volume:
Activate the ‘Advanced Options’ (red square).
Check the ‘Flip Frame Up-Down’ option (blue square).
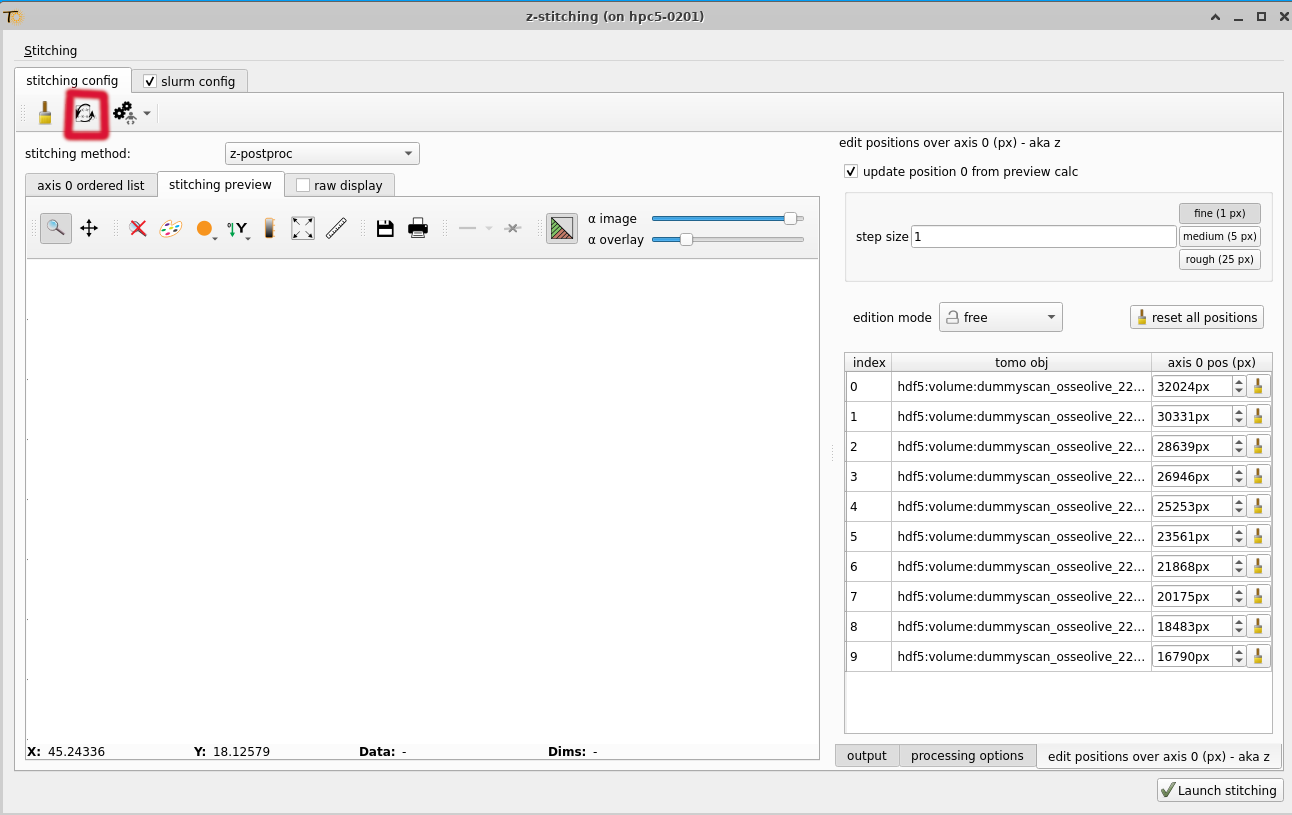
Fine tuning volume positions#
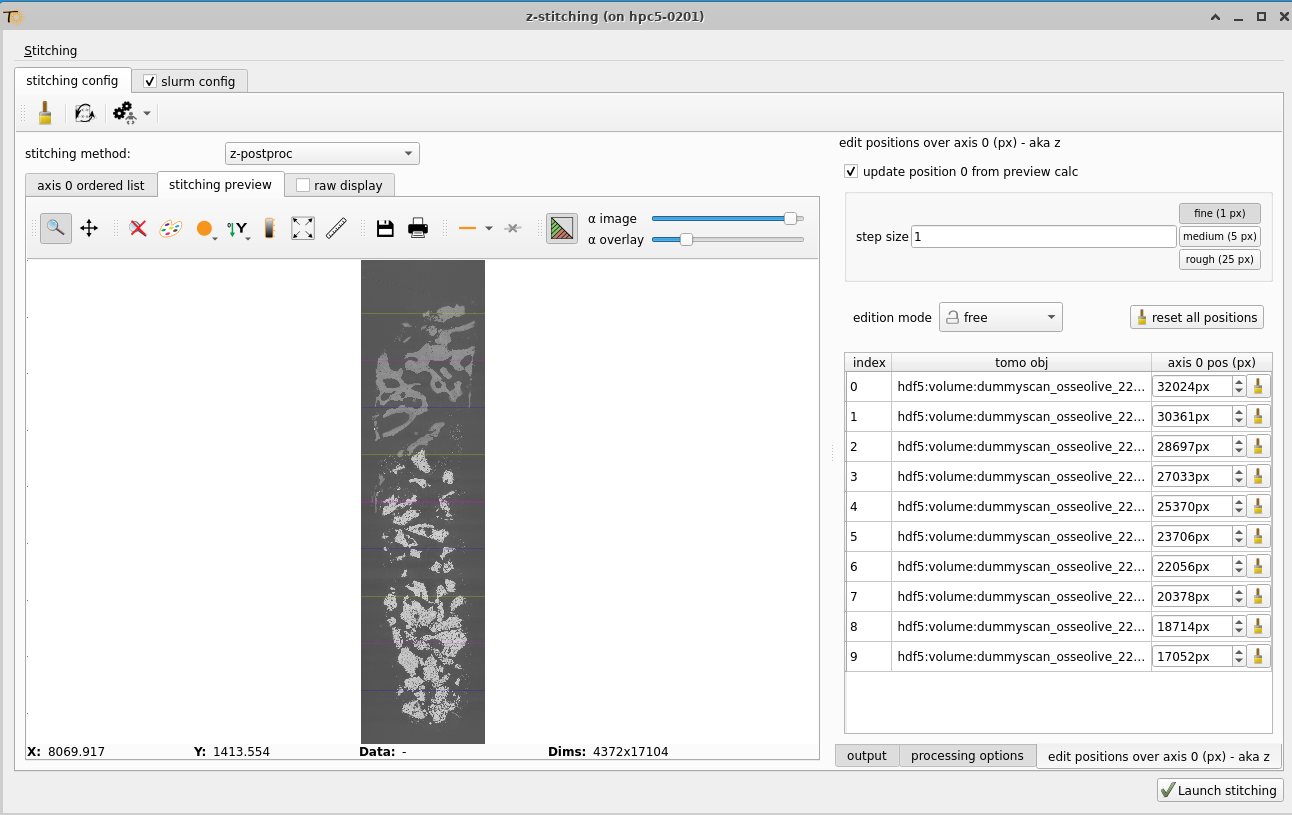
Now, you can inspect each overlap region to verify its accuracy.
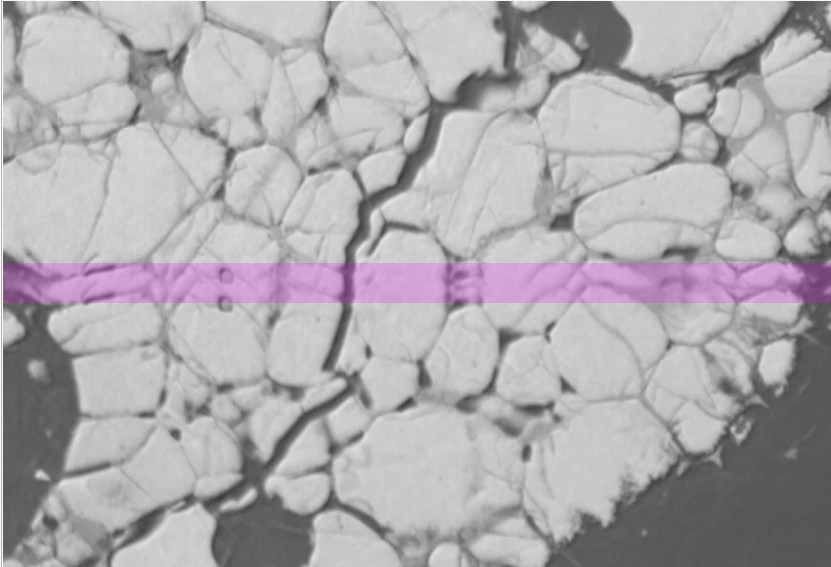
If the volume overlap positions are incorrectly identified by the cross-correlation algorithms, you may notice ‘duplication’ artifacts, as shown below:
If this occurs, you can either:
Try a different shift search method
Manually adjust the positions (see details below).
Update the positions manually#
When setting positions manually, follow a consistent editing order — either bottom-to-top or top-to-bottom—to ensure accuracy and avoid inconsistencies.
Frames are always positioned relative to their adjacent (upper or lower) frames. When you modify a frame’s position, you should propagate this shift to adjacent frames to maintain alignment.
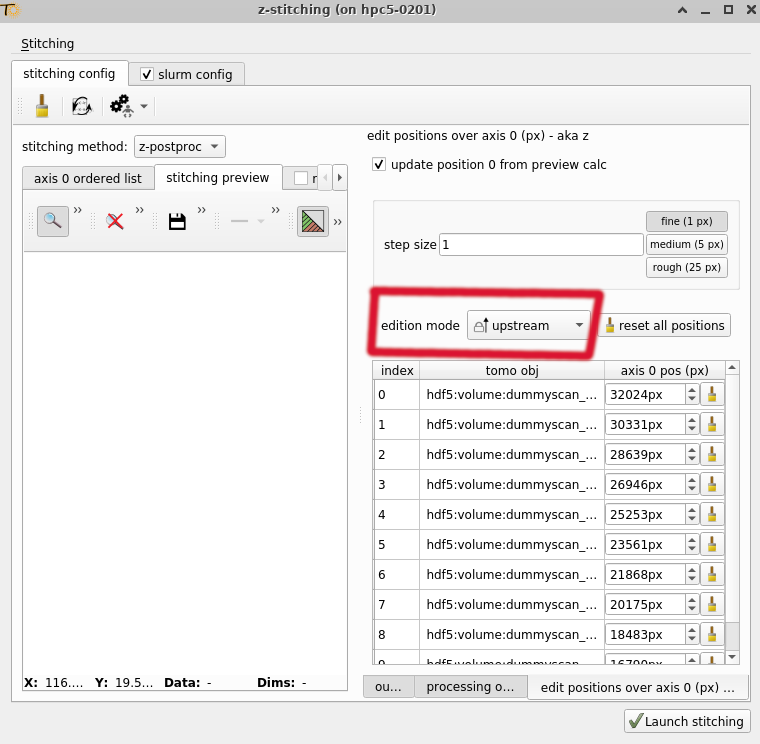
Locking values mode * Free: Will only affect the position edited. * Downstream: Will affect the position of the current frame and all the frames below. * Upstream: Will affect the position of the current frame and all the frames above.
Hint
A link ‘icon’ is used to indicate that the values are locked together. When the link is ‘broken’, the values are not locked together.

You can determine the relative shift between two frames by using the ‘Ruler’ button and selecting two points on the plot.
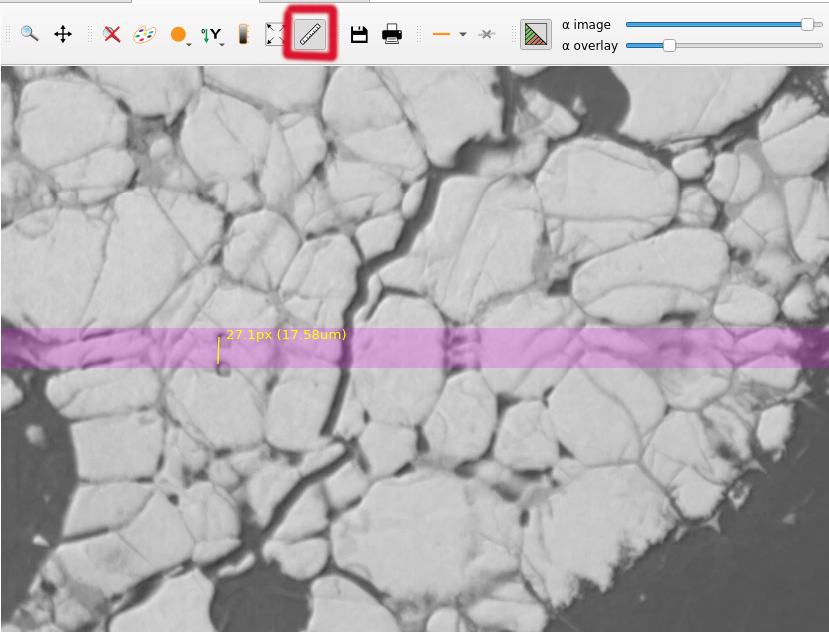
Next, add or subtract this value from the position, depending on the direction of the relative shift. For this step, you can use a calculator or a Python console.
Update the preview to make sure the update values are correct (F5)
Repeat this process for each overlap region.
Hint
check that the orientation of the volume / positions are correct by checking back previous overlap once solved
Launching the stitching#
You can either do the stitching locally or remotely (using slurm).
Stitch locally#
In this case uncheck the slurm config option
Then just click on ‘Launch Stitching’.
Stitch remotely (using slurm)#
In this case check the slurm config option.
Note
this this option is disabled this mean that you are not launching the application from a computer that is not a slurm-client.
When launching the stitching on slurm you can fine tune some parameters:
queue/partition: partition to trigger the stitching. Reminder: you do not need any GPU for this operation. Expected partitions: nice, nice-long or low
number of cores per tasks: how many CPU to use. We expect a value between 1 to 4
memory per tasks: frames at the moment are stitched by batch of 50. So you need to have enough memory for load 50 slices of each volume and save the stitched slices.
wall-time: timeout of each job.
number of job: on how many job the stitching should be split. We encourage that each job creates a sub volume of 50 to 120 GB to keep good performances.
Then just click on ‘Launch Stitching’.
When the stitching will be done the ‘master’ file will be creating that can connect all the stitching part together.